1. The Electronics
Rebuild and then Replace the Power Board
As for the electronics and the electrical wiring on this game, there was a lot done to the game. Back when I first took the game to my friend Tony's house, I had to rebuild the power supply. It was in really rough shape where someone had done some major hacks to it. Finally, after a year or so, I went ahead and replaced it with a replacement board. This was the first time I had ever done this. Re-doing the wiring from the transformer to the power board is a bit of a pain on these early Bally solid state games. There are wires that need to be soldered directly to the back of the board which isn't fun especially when you have to remove the heavy transformer out of the game to your work bench. I'm not sure why they designed these early games this way rather than have the wires come off of the transformer into one or two connectors and then connect to the power board. Anyway, I replaced the board and all was good.
Splice the cabinet and some of the playfield wiring due to mice infestation
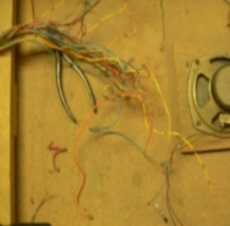
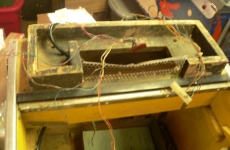
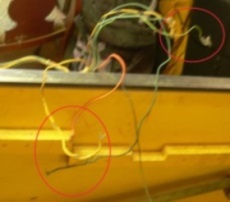
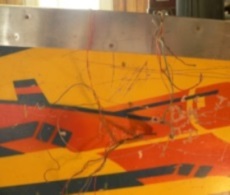
When I brought the game back home from Tony's house, I found out that mice had built a nest in the rear of the cabinet and had chewed through almost all of the wires in the harness from the cabinet, several of the wires from the playfield, and the speaker wires (along with making mince meat of the manual). So, I ended up having to repair almost 75 wires in total. While the work wasn't hard, it was time-consuming. I had to snip all of the zip-ties on the harness so I could better get at the wires and then I had to match the wires and splice them. The main issue I ran into was that some of the wires were chewed in multiple places so I had to remove a fair portion of the wire and splice in a long section. It wasn't just a matter of connecting two broken wires. I had to splice in a link of wire which required two sections per wire to be soldered. Fortunately, I had the spare playfield so in most cases I was able to find an exact color match for the wire.
In repairing the wires I stripped the ends, put some shrink tubing on the wire, twisted the wires together for a mechanical connection, and then tinned them with solder to make a more permanent connection. I then heated the shrink tubing to cover the bare exposed wire. Again, it wasn't difficult, but with so many wires, it was time-consuming.
Rebuild all Power Board connectors and re-do the wiring
So, this is where my previous work in installing the new power board coupled with the new wiring splices caused me to have more work to do now. Here are the two issues I ran into. First, years ago, in my first rebuild of the power board, I thought I'd get "smart" and instead of desoldering the wires from the transformer, I cut them and then used single-wire male/female connectors on the wires to re-attach them. My thought was that I wouldn't have to remove the transformer anymore. All I would have to do is disconnect all of the wires. Why I didn't crimp them into a connector still puzzles me. But, I was new to this and didn't think of that. So, these single wire male/female connectors took up a lot more space around the power board and transformer (an area that doesn't have a lot of space).
Second, the new splices I had just made in the wiring harness resulted in some of those wires being three inches shorter. These two things coupled together (the single-wire connectors and shorter wires) caused a few problems with the routing of the wires. There was barely enough slack for the wires so that the board connectors could barely reach and fit the pins on the board. Add to this the fact that the male/female connectors took up extra space and made it so the board had very little "wiggle" room when connecting to the stand-offs. It's difficult to explain, but when you combine the "tight" "little-slack" wiring with the "takes up extra space" connectors, it made it very difficult to connect, wire, and install the board. It also didn't help that the plastic stand-offs that hold the board were also damaged. So, I decided to remove it all and re-do all of the wires going to the power board from the playfield, cabinet, and transformer. I basically lengthened all of the wires about three inches so that they had plenty of slack. I then removed the male/female connectors from the transformer wires and soldered them directly to one another like they were originally. I figured I wouldn't be removing this board for a long time and it was a new board. Finally, I installed new stand-offs to hold the board. It ended up being a lot extra work I hadn't planned on doing.