Machine Statistics
Production Date: June 1978
Production Run: 4,883 solid state versions; 120 EM versions
Design: Jim Patla
Artwork: Dick White
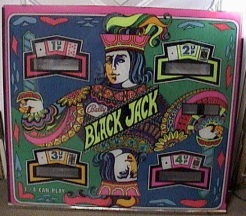
The Game Synopsis/History
Black Jack was the last Bally game to be made in both solid state and electromechanical versions. It used the –17 MPU. The object of the game is to beat the dealer at Black Jack. The game begins with both the player and the dealer having a score of 17-21. Then, by hitting various targets or the spinner, you can change the value of either hand. The object is to get the ball in the kickout saucer while the player’s hand is better than the dealer’s hand. There is a DIP switch setting that makes it so that ties can either go to the dealer or the player.
Electronics
This game had three issues that I had to fix. Of the lot of 19 games that I bought from Canada, this wasn't as bad as some. Below is what I had to do to fix the electronics in this game.
Problem #1: When I first turned the game on, the LED was stuck on. Usually, this is caused by acid damage in the reset section of the board. However, in this instance, the U6 was bad. It had a broken leg. I tried to solder it back on, but was unsuccessful. So, I ordered new EPROMs..
Problem #2: After installing the new EPROMS, the LED was still stuck on. Rather than fix the –17 board that was in the game (I did fix it later and installed it in a Strikes & Spares), I used a spare Stern board and installed the new EPROMs in it. The MPU then booted, but only flashed 2 times instead of 7 times. This suggested that U8 (the 5101 chip) on the Stern board was bad. I replaced the U8 and the board booted up properly.
Problem #3: Player #4 display did not work. This was caused by a broken/cracked display glass. So the only option was to swap this display with another working one that I had.
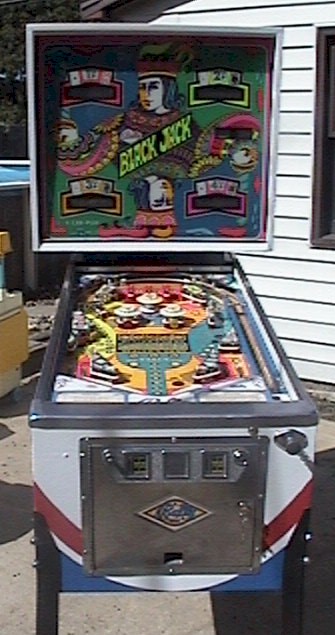
Cabinet
This cabinet was pretty rough. It wasn’t as bad as my Flash Gordon, but nothing is. However, it did have a lot dings. I also had to firm up the internal wood braces. Inside the cabinet, there are three wooden braces that form the area that holds the coin box. The two short pieces were barely attached. I reattached them by screwing them in with some heavy duty screws from underneath the cabinet. The wooden piece that houses the on/off switch was also loose and needed firming up. Again, I used screws from underneath the cabinet to help hold it in place.
In painting the cabinet, as usual, I made stencils of the designs on the head and sides. (Click here for a description of the process.) The cabinet had three colors. White was the base color, while blue and red were the applied colors. The design on both the head the cabinet sides were fairly simple. I made the stencils by first tracing the design onto tracing paper. I marked the blue and red sections appropriately on the paper. I then transferred this to clear acetate sheets. Fortunately, the designs on the head and sides were mirrored. Thus, I only needed to make six stencils, three blue ones (front, head, side) and three red ones (front, head , side). After painting one side, I could then flip the stencil over and do the other side.
Next, the cabinet was stripped. I used Citrus Strip. IMHO, this is the best stripper on the market. It works better than a lot of other strippers, and it is safe to use indoors. After stripping the cabinet, I had to fix all of the imperfections, dents, dings, and carvings. I used both wood filler and Bondo for this process. The wood filler works great for the smaller imperfections and is easy to work with. Bondo is great for bigger dings. I then sanded the cabinet with 150, 220, 320, and 400 grit sandpaper wiping it with mineral spirits in between sandings to remove the loose particles. Next came the actual painting. I taped off the metal rails and other areas where I didn't want to get over spray. The base color was white. It took about three coats of Krylon gloss white.