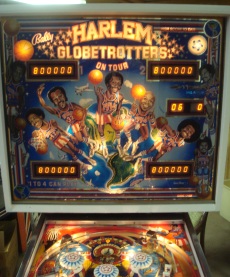
Machine Statistics
Production Date: September 1979
Production Run: 14,550 units
Design: Greg Kmiec
Artwork: Greg Freres
The Game Synopsis/History
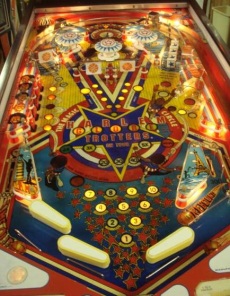
Harlem Globetrotters was a classic Bally design that featured a new sound board which played the Sweet Georgia Brown theme when a game was started. At the top center it had a saucer that awarded the letters g-L-O-B-E. The letters would alternate at about half-second intervals and you would be awarded the lit letter when the ball landed in the saucer. The goal was to spell gLOBE. On the right the game had a stand up target located about an inch and a half inside some posts called the DUNK area. Being recessed inside the posts made it a little difficult to hit. Also on the right a set of in-line drop targets common to Bally games of that era guarded another saucer. The center had two spinners that awarded bonus points. The left side had another spinner with a lane feeding the top and then five stand up targets, one for each of the starting five of the Globetrotters. The right hand side had your normal flipper with slingshot and inlane feeding the flipper. It also had a ball gate on the outlane that diverted the ball into the plunger area when open. The left hand side had the dreaded two flipper configuration that were notorious for balls draining between the flippers. By most accounts, this is one of the classic Bally games of the era. The theme makes it family friendly and keeps it from being dated.
Electronics
This was one of the few games that actually worked out of the lot of 19 games that I bought from Canada. For those who haven’t read the story on these game, I bought 19 classic games from the late 1970s to restore. All of the games were supposed to be working and I figured all I would be doing was restoring the cabinets and playfields. Well, only 5 of the games actually worked. This happened to be one of them. But, after about three years, this game did begin to exhibit problems. so, here is what I did to the electronics of the game.
First, I rebuilt the connectors and replaced the pins on the power supply board. The original connectors were gone and the wires were soldered directly to the pins. While this would work, it did not allow for easy disconnects. so, the power board has new pins (I replaced the old ones) and new connectors for the wiring.
Second, I replaced one set of pins on the driver board (J3 upper right).
Finally, I had to replace several transistors on the light board. There were several lights that did not work. On these older games, determining the reason for the lights not working can be a chore because it can be caused by a bad bulb, bad socket, bad connector, bad wiring, bad transistor, bad driver chip, or multiples of these. On this game, there were several lights that needed new transistors, a couple which needed the wiring resoldered, a couple that had a loose connector, and several that had bad lamps. And, some had multiple problems making the diagnosis a little more difficult.
In determining the cause for non-working lights, here is how I do it. First, I have a spare light board that I know is good. I install that in the game and see which lights don’t work. Thus, I eliminate the board from being the cause for those lights. I then try a new lamp. I also try to tighten the socket to see if this works. If that doesn’t work, I then desolder a wire from a lamp that works and touch its wire to the non-working lamp socket. If the light works, then I know the problem is in the connector or the wiring. If it doesn’t, then it is probably the lamp socket itself. I then grab a spare lamp socket and touch its base to the ground wire and then the suspect socket’s wire to the lamp lead. If it works, I know that the socket is bad and I replace it with another lamp socket. If the problem is not the lamp or the socket, I then test the connectors and wiring. This should find the problem since I know it is not the lamp board.
After fixing all of theses lights, I then re-install the light board that I am going to use and see which lamps do not work. I then test the transistors and/or driving chips for these lamps and replace where necessary.