Machine Statistics
Production Date: August 1977
Production Run: 12,820 units
Design: Gary Gayton
Artwork: Kevin O'Connor
The Game Synopsis/History
Strikes and Spares was one of the first generation solid state games produced by Bally. It used the –17 board and had chimes for sound. The start-up tune is known in professional horseracing as "The Call to the Post." Odd that they would use a theme used in horse racing for a bowling themed game.
Strikes and Spares is probably best known for the artwork on the backglass. This backglass has become one of the more collectable backglasses around. Besides the more obvious attraction of the backglass, there are also a couple of humorous drawings on it. Also, if you will look at the score card surrounding the second player display, you will see where artist Kevin O’Connor signed his name.
In my lot of 19 games that I bought out of Canada to restore, there were two Strikes and Spares. This particular one was the better of the two. In fact, the second one was in very rough shape. As usual, the first few pages detail the work I did on the game followed by picture pages showing the before and after.
Section 1: Electronics
Problem #1:
The MPU would not boot. As is the case with many old Bally games, there was some battery acid damage to the MPU. The acid damage messed up the reset circuit so I had to rebuild that section. I rebuilt that section using the corrosion repair kit from Great Plains Electronics (GPE). Ed at GPE has the best prices on electronic components and he will bend over backward to help you. I also installed a remote battery holder to prevent further acid damage.
Problem #2:
I upgraded the power supply board by doing some of the modifications suggested on Clay’s site. I replaced the 8 amp bridge rectifiers with the heftier 25 amp bridges. I also replaced the header pins and re-did the housing connectors. Upgrading the power supply is a little more difficult than working on the other boards. This is because many of the wires from the transformer are soldered directly to the rear of the circuit board. Therefore, it is tough to remove the board from the game. So, I drew a diagram of the wiring before removing the wires. The schematics tell the wire colors and where they should be attached, but it is a little difficult to follow. After doing this and then working on another power supply, I decided that it was easier to remove the board and the transformer together without desoldering the wires going from the transformer to the board. Just a note, but another thing you can do is create your own connector.
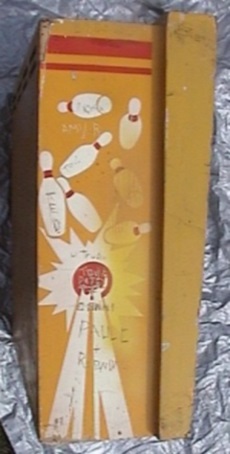
Section 2: Cabinet
The cabinet was in pretty bad shape, though not as bad as my Flash Gordon or the other Strikes and Spares that I have. It had a lot of dings and scratches, but fortunately, it didn’t have a lot of major gouges requiring major repair.
First, I made stencils of the designs on the sides. I used the same technique as described on Flash Gordon, Silverball Mania, and Alien Poker. The Flash Gordon section has detailed description of how to make the stencils. Pictures of the stencils for this game can be found here.
After making the stencils, I laid them on the cabinet to make sure that they lined up correctly. Once I am satisfied with the stencils, I strip the old paint off of the cabinet. I used Citrus Strip. IMHO, this is the best stripper on the market. It works better than a lot of other strippers, and it is safe to use indoors.
After stripping the cabinet, I had to fix all of the imperfections, dents, and dings. I used both wood filler and Bondo for this process. The wood filler works great for the smaller imperfections and is easy to work with. Bondo is great for bigger dings. I then sanded the cabinet with 150, 300, 400 grit sandpaper wiping it with mineral spirits in between to remove the particles.
Next came the actual painting. I taped off the metal rails and other areas where I didn’t want to get over spray. I always use Krylon paints for the cabinets because you can recoat at any time without any lifting. In fact, I have never had a lifting problem with Krylon until this cabinet. I must have gotten a bad batch of orange paint because it lifted in some places. Here is a picture of the lifting. It doesn’t look bad and it has been clearcoated to prevent it from flaking. In fact, it gives the orange a textured or stucco look. But I wanted to mention this “flaw.”