Playfield Overlay Installation
This is a step-by-step explanation of how I installed my Space Invaders overlay. See the previous page for a discussion on wet versus dry methods and the details behind this overlay installation. My suggestion is to research as much as possible before doing this. Below is how I did it with some explanation as to how and why. In the end, my installation turned out surprisingly well with no issues.
Steps For Installing the Overlay
- Flatten Your Overlay. Most of the overlays are shipped rolled up in a cardboard tube. You want the overlay as flat as humanly possible. To flatten it, you need to place it between two flat surfaces that are smooth enough to not damage the overlay. I used playfield glasses. Since I have several games and some spare glass, I put my overlay between pieces of glass and let it sit for over a month (remember, mine had been rolled up for at least five years!). Note that most overlays are larger than the playfield. While you don’t want to cut the excess just yet, if you don’t get the edges that extend beyond the playfield completely flat, that is OK. You just want to make sure that the part that is going to touch the playfield is as flat as possible.
- Take LOTS Of Pictures. Again, take LOTS pictures, both close-ups and full playfield pics for every step in the process when tearing down the playfield. Don't trust your memory!
- Remove The Plastics. Simple process. Take pictures noting the screws that hold any plastic to the side rails. I like to take a picture of the removed screw next to the hole I removed it from. This will help you identify it later. Also, put these screws in their own “baggie” and label the bag. Note, if you are going to tumble them with other playfield parts, then having the pics will be a big help.
- Remove The Rubbers. Again, simple, but take pictures before you remove them so that you can know where they are supposed to go. The new rubbers kits that you buy have charts in them, but the charts are based on the manual and I have found a few times where the manual is incorrect.
- Remove Playfield Posts. Remember, take plenty of pictures as you go. Note also that there are multiple post styles and post screws. The posts themselves, depending on the game and the manufacturer, can be faceted, horizontal ribbed (finned), jeweled, or a specialty post. They also come in a couple of heights, so you want to make sure if you get new ones to get the correct type and height. As for the screws, most of the games from this era use four types of post screws: Extended wood screw (extended top for going through a plastic and a “pointed” bottom), regular wood screw (“pointed” bottom with regular Phillips head), extended thread screw (extended top for going through plastic with a machine threaded screw bottom), and regular thread screw (Phillips top with machine threaded bottom).
- Document What You Remove. I do two things as I am removing the posts. First, I take a picture of the post’s screw laying next to the post and the hole it was screwed into. This lets me know the type of screw that was used for that post. Also, in a notebook I draw a rough diagram. On the diagram I label the screw type A,B,C,D to correspond to the types mentioned above. This may seem like overkill, but if you ever have to pause your restoration, you will be glad you did this.
- Remove Lights. There will be several general illumination lights that are best removed from the top side of the playfield. I try to remove them as early as possible to prevent from accidently breaking one.
- Remove Remaining Parts. Depending on the complexity of the game, what is left is usually wire-forms, bumpers, spinners, metal mini-posts, and ball gates. I am going to assume that you can remove these without instruction. Note that the wire-forms may need a little “leverage” to remove them. Again, take lots of pictures noting the holes for the wire-forms.
- Remove The Playfield From The Cabinet. For me, the preceding steps are easier to do while the playfield is still in the cabinet. The cabinet is a “natural” platform for working on the top side. However, the next steps are easier to do with the playfield removed.
- Remove The Side And Back Rails. These are held on by screws underneath and by a few staple-like fasteners. After removing the screws, you will need to pry the rails up slowly due to the staples. Again, take pictures and document in writing. Note that once removed, I usually re-paint the rails as they usually have scuffs and ball marks on them. Painting is easy to do at this point.
- Create A “Hole” Template. You should now have a flat top side with no parts remaining. The next step is VERY IMPORTANT. You need to create a template that marks the position of EVERY hole in the playfield. Once the overlay is applied, the holes are covered. At that point, you need a way to determine where the holes are, which is the purpose of the template. To make the template, you need either a large roll of tracing paper or a large sheet of thin, clear acrylic. You can get either at your local hobby or arts supply store. The key is that you need a sheet that is large enough to cover the playfield and transparent enough to see through. I used a clear acrylic sheet because I thought it had less chance of getting damaged before I was ready to use it. Once you have your sheet, lay this on the playfield and secure it tightly with tape. Now, trace the edges of the playfield onto the template. The outer edges need to be precise as you will use these for positioning later. Next, trace the outlines of the large holes (bumpers, slings, drop targets). Next, mark every screw and wire-form hole on your template. Make sure the template stays in position and does not slide. You need to be accurate. Make notes detailing what each hole is (lights, wire-form hole, wood screw hole, threaded screw hole, bumper holes, mini-posts, gates, outholes, slings holes, spinner, etc.). Once the template is done, go over it a second time to make sure you didn’t miss any. Then remove the template and replace it, making sure everything lines up. Once you are satisfied, store the template in a safe place and go on to the next step.
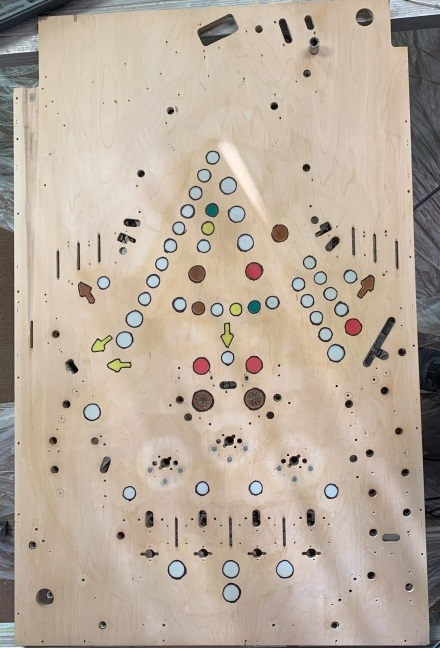
- Sand The Playfield Bare. Sand the playfield down to the bare wood. I used an orbital sander to do this. I was afraid a belt sander might be too aggressive and accidentally create a “valley” in the wood. Once bare, sand progressively using 200, 400, 800 grit paper. Wipe the playfield clean.
- Repair Inserts. Over time, inserts can dimple or sink below the level of the playfield. The clearcoat process can mask small issues but if you have a really bad insert you will need to replace it or carefully knock it upwards into position.
- Outline Inserts. No two playfields are EXACTLY alike. Thus, no overlay will match 100%. This “mis-match” is most noticeable around inserts. Typically, some bare wood will show around some of the inserts. To prevent this, take some black acrylic paint and carefully paint the wood around the inserts. Don’t use a black marker as this might bleed when you apply your clear coat.
- Clearcoat Your Bare Wood. You don’t need to apply multiple or heavy coats. You just want to put on a couple of layers so that the overlay has something to adhere to. I used a Varathane spray clear coat. It takes a day between coats and I used about 4 coats on this step. I find it best for each coat to cover the playfield using horizontal passes and then using vertical passes. Follow the directions of whatever clear you are using.
- Setup For Overlay Install. In getting ready to install your overlay, you want to set up the playfield in a place and position that is both comfortable for you and a partner to work around. So, you want a lot of space, enough room for two people to move freely. Second, try to set it up at a height that is comfortable for you to work. You don’t want it to be too low or too high. Too low stresses your back while too high can make it difficult when you are “peeling” the backing upward and away from the playfield. Third, if you have a playfield that IS populated on the underside, and don’t have a playfield rotisserie, you will need to make sure that your set up is sturdy and steady enough to hold the playfield without the possibility of it falling. This can be a bit tricky with a populated playfield. For me, I used two folding dry-wall platforms. I put some blocks underneath to raise them to my desired height. I then spaced them so that the playfield would fit between them with the sides hanging on the edges. There is about 1” to work with on each side of a populated playfield. I then “blocked” in my platforms so that they would not move. I was afraid I would kick one moving it and causing my playfield to go crashing down.
- Trim Your Overlay. The overlay will be larger than your playfield. Trim the top, bottom, and sides leaving at least three inches on the top and bottom. This will make the overlay easier to handle. You will use the extra area later to attach a straight edge that will help when applying the overlay. Just make sure to not trim off too much. You can always cut more off later if necessary.
- Test Your Overlay Positioning. Get a strong light and place it under your playfield so that from the top you can at least see some light in the inserts. Next, lay the overlay on top and practice positioning it. It will not fit perfectly. As stated earlier, no two playfields are exactly the same. As you practice positioning the playfield note the areas where it is a little off. Hopefully, the black you painted around the inserts will mask most of the issues. The key here is to try to pick the best position to disguise or hide where the playfield is off the most. For example, maybe there are inserts behind the pop bumpers and the lower area of the inserts isn’t normally visible from the players’ perspective. Adjust so that is where the “misses” will be. Once you have the best position for your overlay, securely tape the middle of it to the playfield.
- Get A Straight Edge For Handling The Ends. This can be a metal ruler or a wood strip. Tape this to the end of the overlay. Basically, you are going to install the overlay one half at a time starting in the middle and working toward each end. I used a metal ruler as my straight edge. Tape this to the end you are going to attach first.
- Get A Partner And Install Using The Hinge Method. In theory, you can do this by yourself. The two videos I have linked to show guys doing this by themselves, but having a partner will make this a lot easier. This is the scariest part of the process. In fact, I put this off for a month before my wife told me to do it and get it over with. Note, she was my partner in applying it.
- Install The First Half. At this point, the overlay is in position and taped down securely across the center. Tape your straight edge along the end (here for excellent video example). Fold back one end of the overlay and peel off the protective layer from one end. While your partner holds the overlay with the straight edge up, cut away the protective layer. Have your partner hold this end up as you peel the backing off until you reach the middle. The straight edge that you tape to the end that your partner is holding comes in handy here. It will prevent the overlay from accidentally crinkling or having a section stick to itself. So, at this point, your partner is holding the overlay up from one end while you have the protective backing peeled off down to the middle. Carefully cut the backing making sure you don’t twist the overlay. Once the backing is off, start at the middle and slowly apply the overlay. Your partner will slowly allow the overlay to come down in contact with the playfield starting at the center and working toward the end. You will slowly and gently burnish (rub down) the overlay as it comes in contact with the playfield pushing out air bubbles. Watching one of the video links will give you an idea of what I am describing. Note that the burnishing can be done by your hand with a soft glove or using a plastic burnishing tool.
- Install The Second Half. Once the first half is down. Take your straight edge and attach it to the other end of the overlay. Do the same thing on this end that you did with the first half. Lift the overlay up and peel off the protective backing starting at the center this time. Then go back to the center and slowly apply the overlay. Go slow and burnish as you go having your partner holding the overlay with the straight edge and lowering it slowly.
- Trim Excesses. Once you get the whole overlay on, trim at the top, and side edges. Use your discretion where to trim at the bottom. I would make sure that the overlay covers all visible areas. My overlay covered the shooter lane. Some overlays can be trimmed so that the shooter lane is bare wood. If you do this, note that there is going to be a section where the ball travels from the wood on the shooter lane to the overlay. This area will get a lot of wear.
- Roll Out The Air Bubbles. Use a rubber roller (wallpaper roller) to roll the whole playfield. If using the wet method, always roll from center out in all directions as you want to push the water out. If using the dry method like I did, roll in all directions (left, right, up, down, diagonal). You want to get all air bubbles out, even microscopic ones. If you used the wet method, be sure to roll out all the water or you are asking for issues later. If you used the water method, let the playfield sit for a few days to make sure that all water has evaporated.
- Clearcoat The Overlay. This was something I wasn’t sure if you should do or not. I read where some people did it so that is what I did. It will add a little more shine and a layer of protection. Again, I used Varathane spray acrylic and applied about 6-7 coats. Follow the directions for whatever clear you are using. Mine required 24 hours between coats, so this part took about a week to finish.
- Exacto Knife The Big Holes. Next you will need to cut out what I call the big holes in the playfield. These are holes that are larger than screw holes. For Space Invaders, this included lamps, switches, slings, flippers, 3 drop target bank, single drop target, spinner, four passive bumpers, and 3 pop bumpers. You probably won’t need your template to find the “big” holes. You can run your fingers in the approximate area and feel the depression. Take the Exacto knife and poke a hole in the center. Then cut toward the edge of the whole and cut out the area. You will find this easy to do (as long as you have a sharp blade) as the knife will slide along the edges of the hole effortlessly. Round holes like lamp sockets and pop bumpers can be easily cut with a circular twist.
- Do The Screw Holes. This is where you will need the template you created earlier. Lay your template on the playfield and line it up. It will give you your screw locations. To make the screw holes, here is what I did. I saw where the hole should be based on the template. Then I moved the template and carefully rubbed my finger along that area. From that I could usually feel where the hole was. I then took a very small finishing nail or tack and pushed it through the overlay and into the hole. Once you do this a few times you will get the hang of feeling where the holes are. Do this for all of the wire-form and screw holes. These are "starter" holes for your screws. If you use the screw before poking these holes, you run a great risk of the overlay twisting at that spot. Basically, the tack/finishing nail hole is like making a pilot hole before you drill.
- Star Rollovers. Use the Exacto knife to carefully cut the openings. For me, I had to do this several times and do a bit of scraping to get it to where these would move freely and work correctly. Remember that I clearcoated the playfield before applying the overlay. This caused clear to get into the star channels and is why I had to do the scraping later.
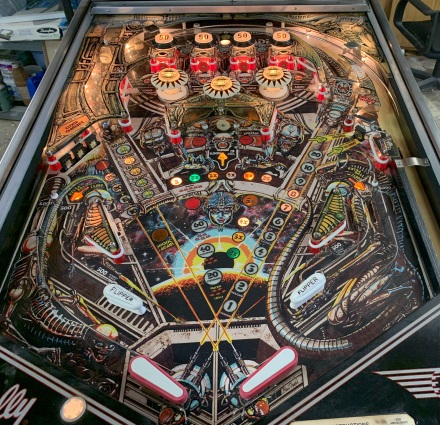
- Install Playfield Parts. Now that the holes are "piloted", the playfield parts are ready to be installed. On your first time make sure that you screw slowly. I didn’t have any issues but it’s possible if you are too fast it could damage the overlay at the screw.
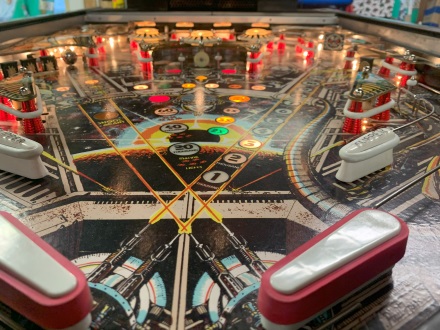
Again, my installation turned out great using the dry method. At the time of this writing, it has been on for over two months and I have not had any issues.