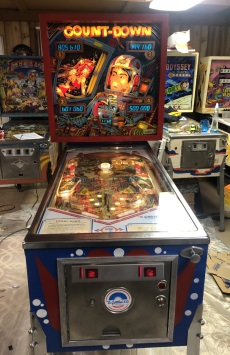
Backglass
The backglass was in very good condition for a game this old. I sprayed the back with Krylon Triple Thick to protect it from future delamination. To do this, I taped off the score and credit windows with masking tape and then sprayed the rear with three coats of Triple Thick, alternating the direction of my strokes with each coat. The only real problem was in the blue score windows where the transparent blue was “spidering.” Again, this is a common problem with all Gottlieb System 1 games. In fact, it did this on all four of my System 1 games. To fix this, I scraped off the old blue using a straight chisel style exacto blade and then added theatre gels with a blue tint to the windows. I used the Roscolux 71 gel. There is a Lee equivalent: 172 (Lagoon Blue). The gels come in a sheet abut 30” X 22”. I cut the gels in pieces slightly larger than the score windows. I then secured the filters with Mylar. The final result was excellent. It makes the score displays show up as if they are behind a brand new backglass.
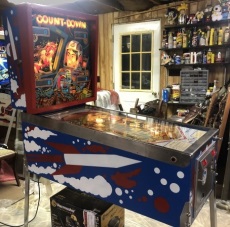
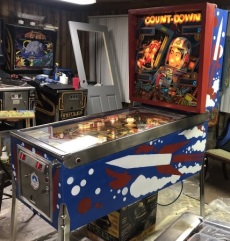
Playfield Touch-Up and Clearcoat
The playfield was typical for a game this age. It had some cracking and a couple of larger wear areas. I got my wife to help with touching up the wear and she did a great job matching the colors and design. I stripped everything off of the playfield including the apron and the back arch assembly. I taped off all areas where I didn't want to get overspray (lamp sockets, saucer, tops of drop-targets) and cleaned the playfield really well in prepping for the clear coat. I put 8-9 layers of clear-coat on the game. The Varathane brand that I used has changed their formula a bit so that you could add a new coat after an hour instead of their previous formula which required waiting 24 hours. So, it took a couple of days to actually do the re-coat as I waited a minimum of 90 minutes between coats. The coats I applied were thin, light coats.
Metal and Plastic Part Buffing and Cleaning
All of the small metal parts--screws, posts, small wire forms--I polished by tumbling in a rock tumbler for 24-48 hours with corn cob media. I'm thinking on buying a larger vibrating tumbler for future projects. I also ran these parts through a supersonic jewelry cleaner. Between the two processes, the small metal parts came out very shiny.
As for the larger metal pieces like the lock down assembly, the rear glass channel, the ball-roll tilt, playfield supports, and the ball shooter, I first de-rusted them using Evapo-Rust. I soaked them for 24 hours to remove the rust. I then used a buffing wheel and Meguiar's Mag and Aluminum Polish to help shine them up. This particular game had a lot of rust on the internal metal mechanisms. The pics will give you a better idea of the before and after. It took quite a bit of elbow grease and work to get the parts looking acceptable.
Coin Door
The coin door on this game was in really rough shape, with a ton of rust, damaged start button, and overall ugly appearance. I didn't do a full tear apart on the coin door, but I did take most of it apart. This allowed me to de-rust and polish most of the pieces (especially the visible areas). The coin door probably has more parts than any other part of the machine. I made sure to take plenty of pictures so that I would remember how to re-assemble it. Fortunately, I had another Gottlieb that I could use to help remind me where parts went also.
The coin door has a square trim piece that had some damage. There were gouges/mars on one section. Unfortunately, I wasn't able to repair those marks but polishing the trim made them not too noticable once the whole door is assembled. The front of the door I completely dis-assembled so that I could more easily clean and polish it. I cleaned it with Mean Green and a scotch pad making sure to only rub in a vertical direction. I then polished it using the Meguiar's also being sure to only rub in a vertical direction.
After re-assembling the door I installed a new Start Button, used the polishing wheel on the grinder to make sure all screws and visible parts were shiny. Finally, I put a new Gottlieb sticker on the front door.