Cabinet Continued
For some reason, I had a problem with the black on one side of the head. It lifted after spraying it on. I’ve never had a problem with the Krylon brand lifting before. It may be that I painted too soon over the Ace brand orange. Remember, it required five days drying time. Or maybe I left some kind of residue on the head. I really don’t know what caused the lifting, especially since it didn’t lift on the other side of the head or on the main cabinet body. At any rate, I had to re-strip that side of the head, re-sand it, and then repaint it. During the repaint I made sure to clean it well and I waited plenty of time between applying the various colors. Needless to say, just the painting on this cabinet took almost three weeks compared to the usual 4-5 days. After applying all of the colors, I then applied Krylon clear to the whole body. This helps protect the color and prevents chipping.
There were probably two things that made this repaint a little less than perfect. First, the stencils had a couple of areas where there are long “flowing” cuts that make the outline of Mata Hari’s cape. These long cuts are difficult to keep the cut smooth and clean. While in the end it doesn’t really affect the look, it is one of those things where I know it’s not perfect. Second, when painting the second side with the black stencil, I got a little more underspray than normal. This was due to the fact that the stencil was thin and curled some after painting the first side. To prevent the curling and lifting, I put weights on the stencils, but it still had areas that allowed some underrspray. Again, it doesn’t look bad. Even the originals had underspray at times. But, it is one of those things where I know. Again, when the cabinet was finished, I was amazed at how good it looked compared to what it looked like originally.
SECTION 3: Playfield
Touching Up Playfield
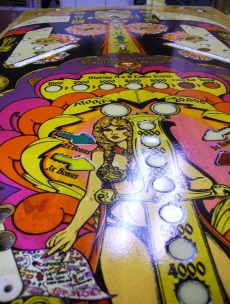
The original playfield had several wear spots. I was able to find a better than average playfield at a very good price. I then swapped playfields. I had to do a few touch ups on this playfield. I then clear coated this playfield. To touch up the playfield, I used acrylic paints you can buy at any art or hobby store. They come in hundreds of shades of color so you can usually find a color that is close right out of the bottle. At about $1 per bottle, I usually buy several shades of the color I am trying to match and go from there. My wife is pretty good at color matching and mixing, so I usually have her help me here. The two areas that needed the most touch up were a purple section and then an orange at the sling shots. My color match was pretty good.
Clear-Coating the Playfield
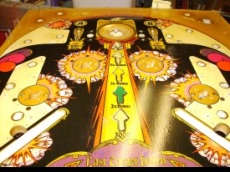
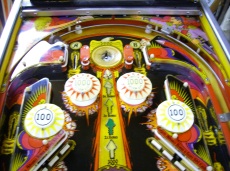
This was the first playfield that I have ever clear-coated. I was very pleased with the end result. I’ll detail the process in a minute. The only regret that I have is that I should have touched up the black circles around all of the inserts. On some of them I left them as they were and afterwards wished I had outlined them with black. To clearcoat the playfield, I removed everything off of the top, including the side rails and shooter rails. Since I was going to rebuild the pop bumpers, tumble the metal posts, and install new rubber anyway, this didn’t add too much time to the whole project. I made a drawing of the playfield and marked where each piece went. I also took pictures in case I couldn’t figure out my drawing later. Once the playfield was completely bare, I cleaned it with Novus 2. Next, I needed to remove the Mylar circles around the bumpers and in front of the slingshots. The ones in front of the slings had been put on after some wear had occurred. Also, there were actually two on top of each other at the slings.