SECTION 2: Cabinet
Making Stencils
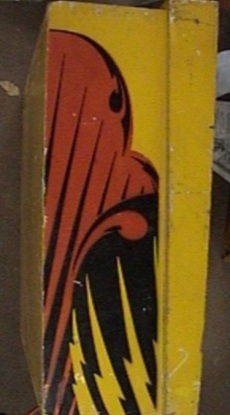
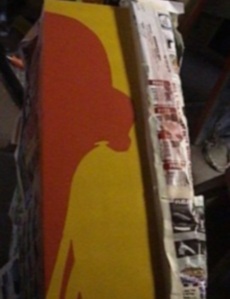
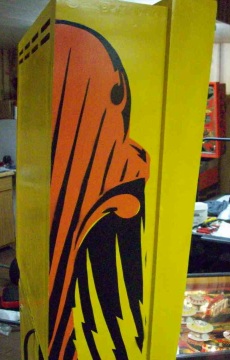
As with all of the repaints, I first taped tracing paper to the cabinet and then traced the cabinet design. Next, I transferred this to acetate sheets, one for each color. On Mata Hari, the design was such that it required one orange stencil each for the head, front, and cabinet sides and then one black stencil each for the head, front, and sides. The stencil only had to be “flipped” to be used on the left or right. You can buy the acetate sheets at most art stores or you can buy it on a roll from Hobby Lobby. The thicker sheets are easier to work with. The thinner sheets are a pain to cut out if the design has intricate details and the thin sheets tend to curl when painted which makes it more difficult when you try to paint the second side. So, even though the thicker acetate costs a bit more, it will save you a lot of aggravation. After cutting out the stencils, I laid the stencils on the cabinet to make sure that they lined up correctly. Once I was satisfied with the stencils, I stripped the old paint off of the cabinet. I used Citrus strip. IMHO, this is the best stripper on the market. It works better than a lot of other strippers and it is safe to use indoors.
Repairing the Cabinet
After stripping the cabinet, I had to fix all of the imperfections, dents, and dings. This cabinet was in pretty good shape so it didn’t require any major repairs. I used both wood filler and Bondo for this process. The wood filler works great for the smaller imperfections and is easy to work with. Bondo is great for bigger dings. Probably the only issue with wood filler is that when painted it doesn’t react exactly like the original wood. It contracts or expands differently than the wood. Thus, in some cases, areas that seem smooth and corrected before painting can then show up with slight imperfections after painting. Yet, none of these is consequential when completed and they add “character” to the cabinet. After filling and repairing the dings, I sanded the cabinet with 150, 220, and 320 grit sandpaper and wiped it down with mineral spirits.
Painting the Cabinet
Next came the actual painting. I taped off the metal rails and other areas where I didn’t want to get over spray. I usually use Krylon paints for the cabinets because you can recoat at any time without any lifting. However, Krylon did not have a color that matched the yellow\gold or the orange. I found a Rustoleum yellow that did match. In fact, it was the yellow they use that matches the old caterpillar yellow used on farm equipment.
I had one problem. This yellow was used on Strikes and Spares as well as Mata Hari. So, I bought about eight cans to do all three games (I had two Strikes and Spares to restore). Well, I did the two Strikes and Spares first so it was several months before I got to doing the Mata Hari. Well, by the time I got to it, two of the cans were defective. One had a bad spray nozzle while the other was old and the propellant wouldn’t mix with the paint. So, I needed two more cans. The only problem was that the store no longer sold this color. In fact, I couldn’t find the color at any paint store. I could buy it by the case, but I didn’t need that many cans. Plus, if I bought that many, even if I had other games to do, by the time I would get to them, it would probably go bad. At any rate, someone suggested I try finding it at a Rural King. Bingo! They sold it for people who like to keep their farm equipment looking new. So, I bought two cans of Caterpillar Yellow (Farm machinery yellow). In painting this cabinet, unlike most games, I did prime the cabinet (which I usually don’t do). However, because the colors being used were “light,” I decided to prime the cabinet with a light coat of flat Krylon white paint. I then painted the entire cabinet yellow/gold. Then I applied the orange/red and then the black. The yellow went on without a hitch.
The process was slower than normal since the Rustoleum product needed two days of drying time before I could paint the next color. Next came the orange/red. Like I said earlier, Krylon didn’t have a match for this color. I found a really close match at an Ace hardware store. They had a “premium” spray paint that was a perfect match. I also liked how the Ace spray paint covered the area to be painted and how it looked when it was finished. However, it had one drawback. Once applied, you had to recoat within an hour or wait five days! Krylon can be reapplied any time without lifting. So, since the paint had excellent coverage, I was able to paint the orange in one day, but I had to wait five days to apply the black.