SECTION 2: Cabinet
This cabinet was pretty rough. It wasn’t as bad as my Flash Gordon, but nothing is. However, it did have a lot dings. Also, the underside and the neck area had some gouges in the wood that had to be repaired. As usual, I made stencils of the designs on the head and sides. (Click here for a description of the process.) The cabinet had three colors. Blue was the base color, while black and red were the applied colors. The design on the head was fairly detailed, while the sides were fairly simple. I made the stencils by first tracing the design onto tracing paper. I marked the black and red sections appropriately on the paper. I then transferred this to clear acetate sheets. Fortunately, the designs on the head and sides were mirrored. Thus, I only needed to make six stencils, three black ones (front, head, side) and three red ones (front, head, side).
After painting one side, I could then flip the stencil over and do the other side. Next, the cabinet was stripped. I used Citrus strip. IMHO, this is the best stripper on the market. It works better than a lot of other strippers, and it is safe to use indoors.
After stripping the cabinet, I had to fix all of the imperfections, dents, dings, and carvings. I used both wood filler and Bondo for this process. The wood filler works great for the smaller imperfections and is easy to work with. Bondo is great for bigger dings. On the bottom of the cabinet, there was a huge gouge that needed to be repaired. This took a couple of applications of Bondo. I then sanded the cabinet with 150, 300, 400 grit sandpaper wiping it with mineral spirits in between sandings to remove the particles.
Next came the actual painting. I taped off the metal rails and other areas where I didn't want to get over spray. The base color was blue. I sprayed about three coats of Krylon royal blue. For this particular machine, I purposely made the paint job a little "heavier" than the original. I wanted a deeper, richer look than the original cabinets had. Thus, I probably used an extra coat of paint, but the end result was worth it.
After the blue, I sprayed the red and then the black. Here is where I made one boo-boo that you can see in the pictures. While doing the head, the right side turned out perfectly. However, I made a goof up on the left side. I sprayed the red and applied a couple more coats than normal. I was then in a hurry to do the black. I usually wait one day to do the next color. However, this time I thought that I could go ahead. The red was dry. So, I took the black stencil and placed it on the head. Now, remember that to use the stencil, I had to flip it over in order to mirror the image for the left side. This meant that the side of the stencil laying against the cabinet had black spray paint on it from painting the other side.
I then sprayed on the black. However, when I removed the stencil, some of the black specks that were on the other side had stuck to red. I had NOT let the red dry enough and this caused some of the black specks to rub off and stick to the red paint. I was able to scrape some of this off, but finally, I had to tape off areas on the left side head and repaint the red. Thus, if you look closely, you can see red spots on top of the red where I taped off the head and sprayed on red to cover the black specks. You can see what I am talking about better by looking at the pictures.
SECTION 3: Playfield
Touching Up Playfield
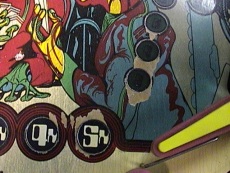
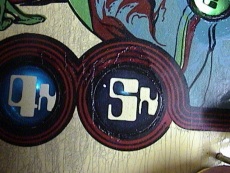
The playfield was in good shape for a game this old. It had some wear above the left saucer, below the spinner, around the bonus multiplier inserts, and the 2,000 and 4,000 bonus light inserts. I touched this up using enamel paints designed for glass. I used to use acrylics because they are more forgiving. However, these other paints are glossier and match the playfield gloss a little better. As usual, the color match worked well, but the texture was not as smooth as the playfield. You can still see the brush strokes. .