SECTION 2: Cabinet
Making Stencils
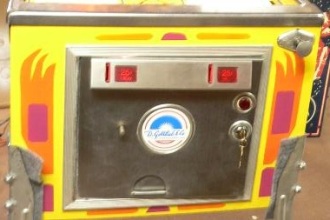
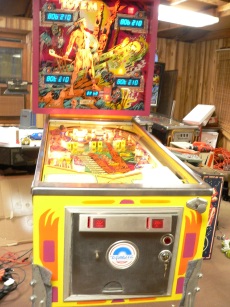
As with all of the repaints, I first taped tracing paper to the cabinet and then traced the cabinet design. Next, I transferred this to acetate sheets, one for each color. The design on Totem was very basic and didn’t require separate sheets for each side. All I had to do was flop the stencil for the other side. On some games, due to the design, you can’t flip the stencil and have to create a separate one. When you do the flip, you do have to mark where the cabinet rail is located as it is different for each side. You can get more detail on the Globetrotters, Mata Hari, and Flash Gordon pages. One odd thing I found was that there were two different color schemes on games I saw on the internet. The colors were the same but applied differently on different games. I kept my original color scheme since I saw more examples of it. The two color schemes are noted in the Internet Pinball Database.
Repairing the Cabinet
After stripping the cabinet, I had to fix all of the imperfections, dents, and dings. This cabinet was in pretty good shape so it didn’t require any major repairs. I used both wood filler and Bondo for this process. The wood filler works great for the smaller imperfections and is easy to work with. Bondo is great for bigger dings. Probably the only issue with wood filler is that when painted it doesn’t react exactly like the original wood. It contracts or expands differently than the wood. Thus, in some cases, areas that seem smooth and corrected before painting can then show up with slight imperfections after painting. Yet, none of this is consequential when completed and they add “character” to the cabinet. After filling and repairing the dings, I sanded the cabinet with 150, 220, and 320 grit sandpaper and wiped it down with mineral spirits. The only issue I had with this cabinet was the back of the cabinet. It had a lot of scratches and scrapes and required a lot of filler. The filler didn’t sand too well and when painted, it is very noticeable. However, since it is the back and isn’t seen, I left it like it was. Had it been anywhere else, I would have re-done it.
Painting the Cabinet
Next came the actual painting. I taped off the metal rails and other areas where I didn’t want to get over spray. I usually use Krylon paints for the cabinets because you can recoat at any time without any lifting. I ran into a couple of issues with this repaint. First, it seems that Krylon has changed their formula to a “thicker,” “wetter” formula, supposedly to get better coverage. So, now you cannot repaint at any time in the process. As a result of this “wetter” formula, I had more problems with overspray than usual. I think also I rushed the process. I should have used several lighter coats. Instead, I put the paint on a little too thick to begin with.
Another issue I had was that I made the stencils several months before getting a chance to repaint. As a result, the stencils “warped” a little over time. So, they didn’t “fit” quite right. So, I had to do the cabinet a section at a time. It took 3-4 sessions on each section on each side. Which means it took several days to do the repaint. I would do the top right of one color. Then do another color on that area. Then I would move to another section until I was finished.
Finally, the design had a lot of long, smooth edges with slight curves. These are difficult to keep the paint from having underspray and it is difficult to maintain perfectly clean lines. So, there are a few places where the lines aren’t perfect. It’s not noticeable unless you look closely, but it isn’t perfect.
Splatter Pattern
On their wedgeheads, Gottlieb used a webbing pattern that was applied after the base coat but before the other colors. On System 1 games, they used a spotted pattern. To create this, I use the cheap plastic kids paint brushes. I would dip it in black paint and then lightly flick the brush like kicking a paper football (but with a lot less force). This would cause the paint to come off in black spots. If you flick too hard, it would make a webbing pattern. So, I practiced by flicking paint onto cardboard until I learned just how hard to flick. See my Tips page for a more detailed explanation on creating the spotted or webbing pattern.
Again, when the cabinet was finished, I was amazed at how good it looked compared to what it looked like originally.


